What you'll want to skim first
- What Seed Starting for Beginners Actually Means
- The Minimum Setup That Works (No Grow Tent Required)
- How to Start Seeds Without Creating a Mold Farm
- The Most Common Beginner Mistakes (And the Quickest Fixes)
- A Realistic Seed Starting Schedule for Beginners
- Hardening Off Isn't Optional
- Practical FAQ for First-Time Seed Starters
Seed starting for beginners gets overcomplicated fast. Search results throw a dozen gear lists at you before you've even asked about soil. I've watched plenty of first-timers put a tray on a windowsill in March, water it every morning, and end up with pale, stringy seedlings. I know because I did it too. The useful thing to remember: seeds don't need love—they need light, moisture balance, and the right temperature. That's the whole game.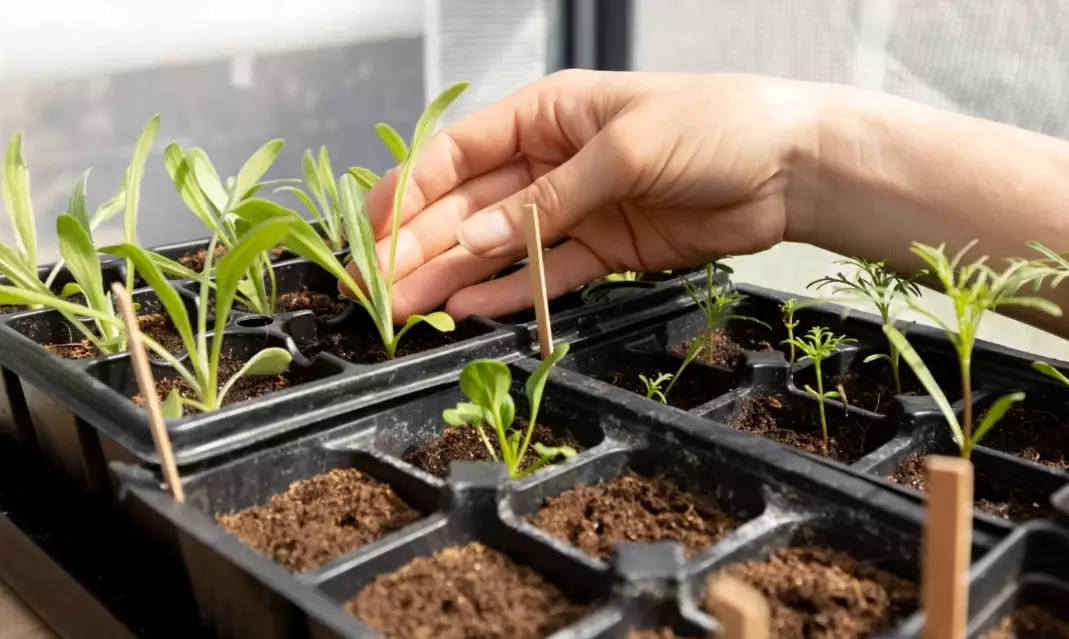
Short answer: start indoors 6–8 weeks before your last frost, use a seed-starting mix (not garden soil), keep soil damp but not soaked, give 14–16 hours of strong light right after sprouts appear, and don't fertilize until the second set of true leaves. Ignore the tiny heater mat once everything is up.
What Seed Starting for Beginners Actually Means
It's not just "plant seeds in a tray." Starting seeds indoors gives you a head start on crops that need a long season: tomatoes, peppers, eggplant, brassicas, and herbs like basil. Crops that resent transplanting—carrots, radishes, dill—usually go straight into the ground. Beginners often mix those two groups and end up with root vegetables in cell trays. Not a disaster, but a waste of time.
Here's what matters more than the seed packet's fancy artwork:
- Germination temperature drives speed. Peppers like soil around 24–29°C (75–85°F); lettuce germinates happily at 15–20°C (60–68°F).
- Light after sprouting prevents leggy seedlings. A sunny windowsill is rarely enough in early spring.
- Moisture balance controls damping off. Wet, cool soil is the enemy.
- Airflow is the cheapest disease prevention you'll ever own.
Compare that to the average beginner routine—misting daily, covering with plastic for weeks, keeping it on a heat mat after germination—and you can see where problems begin.
The Minimum Setup That Works (No Grow Tent Required)
You don't need a professional rack. I've had solid results with a simple shelf near a bright window plus one cheap shop light. What matters is total light intensity and hours, not gear brand names.
| Item | What I actually use | Why it matters | Beginner trap |
|---|---|---|---|
| Seed-starting mix | Fine, peat-free seed mix with perlite | Drains fast, low nutrients, fewer gnats | Using heavy garden soil or compost |
| Containers | 3–4 cm cell trays plus a few 8 cm pots for peppers | Roots get room; less transplant shock | Egg cartons (too shallow, stay soggy) |
| Light | One 2-foot LED shop light, 3–5 cm above leaves | 14–16 hours of light stops stretching | “A south window is enough” in late winter |
| Heat mat | Small mat under pepper and eggplant trays only | Speeds germination for warm crops | Leaving the mat on after sprouts appear |
| Dome | Clear humidity dome, removed at first sprout | Keeps moisture even before germination | Sealing the dome for two weeks to “keep them warm” |
| Watering tool | Small squeeze bottle or bottom tray | Bottom watering prevents damping off | Misting the leaves daily |
| Timer | Cheap plug-in timer | Consistent light hours without thinking | Turning lights on and off by memory |
Don't buy a heated propagator with twenty settings. I did that in my second year and killed a tray of basil because the thermostat sat in the wrong spot. A basic tray and one mat is enough.
How to Start Seeds Without Creating a Mold Farm
1. Pre-moisten the mix, then fill the cells
Dry mix repels water. Put it in a bucket, add water, and stir until it feels like a wrung-out sponge. Fill cells loosely—don't press hard. A light tap on the bench settles it enough.
2. Sow at the right depth
Rule of thumb: sow at 2–3 times the seed's diameter. Tomato seeds barely need covering; pepper seeds want about 0.5 cm. Dust-like seeds like petunias get pressed in, not buried.
3. Water from the bottom, keep the dome on until germination
Set trays in a shallow tray of water for 10 minutes. Lift out and let them drain. The dome stays on until the first sprout appears—then it comes off for good. Leaving it on is how you get white fuzz on the soil surface.
4. Drop the light and start the clock
As soon as you see green, move the tray under lights. Keep the light close—3–5 cm above the leaves. Run it 14–16 hours a day. I set my timer for 6:00 to 21:00 and leave it.
5. Feed only after true leaves appear
Seed-starting mix has almost no nutrients. Once seedlings have two sets of true leaves, start a half-strength liquid feed once a week. Earlier than that, you risk burning the roots.
I learned the hard way that bottom watering doesn't mean “leave the tray sitting in water.” I once left a tray in a full reservoir overnight. Three days later, a dozen tomato seedlings had collapsed at the base—classic damping off. Now I water for ten minutes, then pour off whatever hasn't been absorbed.
The Most Common Beginner Mistakes (And the Quickest Fixes)
Leggy seedlings: stems are long, pale, and floppy. Fix: get the light closer—within a few centimetres—and drop the room temperature a little at night. If the stems are already bent, bury them deeper when you pot them on. Tomato stems root along the buried section.
White fuzz on the soil surface: usually harmless mold from stale air and wet mix. Fix: remove the dome permanently, improve airflow with a small fan on low, and let the top centimetre of mix dry out before watering again. Don't panic-spray anything.
Seeds never sprout: the top three culprits are too cold, too wet, and old seed. Peppers are the slowest—give them two to three weeks. If nothing shows by week three, gently dig one up. A soft, rotted seed means too much water; a hard seed means the temperature is off.
Seedlings stop growing after potting up: usually transplant shock from cold room temperature or damaged roots. Give them bright indirect light for three days, then back under the lights. Skip fertilizer for that first week.
One non-obvious detail: don't water on a fixed schedule. Lift the tray. If it feels light, water; if it still has weight, wait. That single habit prevents more failures than any gadget.
A Realistic Seed Starting Schedule for Beginners
The dates depend on your last frost date. Use a local extension service or a regional gardening site to look it up—then work backwards.
| Crop | Start indoors | Germination temp | Pot up | Set out |
|---|---|---|---|---|
| Tomatoes | 6–8 weeks before last frost | 18–24°C (65–75°F) | When 5–7 cm tall | 1–2 weeks after last frost |
| Peppers | 8–10 weeks before last frost | 24–29°C (75–85°F) | When 2 sets of true leaves | 2–3 weeks after last frost |
| Lettuce | 4–6 weeks before last frost | 15–20°C (60–68°F) | Rarely needed | 2–3 weeks before last frost |
| Broccoli | 4–6 weeks before last frost | 18–24°C (65–75°F) | When 2 sets of true leaves | 2–3 weeks before last frost |
| Basil | 6–8 weeks before last frost | 20–24°C (68–75°F) | When 10 cm tall | 1–2 weeks after last frost |
| Carrots (direct sow) | 2–4 weeks before last frost | 10–20°C (50–68°F) | Not applicable | Direct sow only |
Note on soil temperature vs. air temperature for direct-sown crops: carrots and radishes care about soil temperature. A soil thermometer is a better tool than a calendar for those.
Hardening Off Isn't Optional
I've skipped this step. It went exactly how you'd guess—a tray of beautiful lettuce turned white and shrivelled within two days of planting out. Hardening off takes 7–10 days and works like this:
- Days 1–2: 1–2 hours outdoors in a shaded, sheltered spot.
- Days 3–4: 3–4 hours, gradually into morning sun.
- Days 5–7: 6–8 hours, including full sun.
- Day 8 onward: leave them out overnight if the temperature stays above 10°C.
Bring them back in at night for the first few days. It's tedious but brief. If you only have a few trays, set an alarm on your phone. If you have many, do the whole lot together.
Practical FAQ for First-Time Seed Starters
Fact-checked advice, not a gear advertisement. Every method here reflects what I do with my own trays in a cool spare room—including the failures. The hours, temperatures, and measurements are standard horticultural practice; the tips about leaving the heat mat on, misting, and fixed watering schedules come from mistakes I've made. Your last frost date is the one thing to look up locally before you sow a single seed.
Comments
Share your experience